
-
- Products
- Indoor Household Cords
- Appliance Cords
- General Purpose Short-Length Cords
- General Purpose Extension Cords
- Landscape & Decorating Cords
- Bright Color Extension Cords
- Oil-Resistant Extension Cords
- Cold-Flex Extension Cords
- VividFlex Power Cords
- EXTREME All-Weather Cords
- Cord Management
- Task Lights
- Adapters & GFCI Devices
- Where to Buy
- About
- Careers
- Glossary
- Catalog


How to Choose Shower Glass for Your Bathroom in 2026?
Choosing Shower Glass in 2026 is not only about creating a modern, transparent bathroom. It is about balancing safety, privacy, maintenance, space, and long-term value. A clear glass panel can make a small bathroom feel larger, while textured or frosted glass can soften strong lighting and protect personal privacy. The wrong choice may show water spots every morning, restrict door movement, or make cleaning unnecessarily difficult.
Measure the shower area carefully before comparing styles. Note the ceiling height, wall alignment, drain position, and nearby fixtures. Tempered safety glass remains a dependable option, but thickness, edge treatment, hardware quality, and installation methods also deserve attention. Frameless designs look elegant, yet they demand accurate walls and professional fitting. Semi-frameless or framed systems may offer better stability in uneven spaces. Small details matter.
Real-world use often reveals what showroom displays hide. A coating that reduces mineral buildup can help, but it will not eliminate cleaning. Hard water still leaves marks. A squeegee helps more than many buyers expect. Check the manufacturer’s specifications, warranty terms, glass certification, and cleaning instructions before purchasing. A qualified installer should confirm that the enclosure fits local building requirements and operates safely.
There is no perfect choice.
Your household habits should guide the decision. Families with children may prioritize thicker glass, rounded hardware, and easy access. A rarely used guest bathroom may justify a simpler system. This guide examines the main Shower Glass options for 2026, including privacy levels, glass types, finishes, safety considerations, costs, and maintenance. It also questions popular design trends, because attractive materials are not always practical.
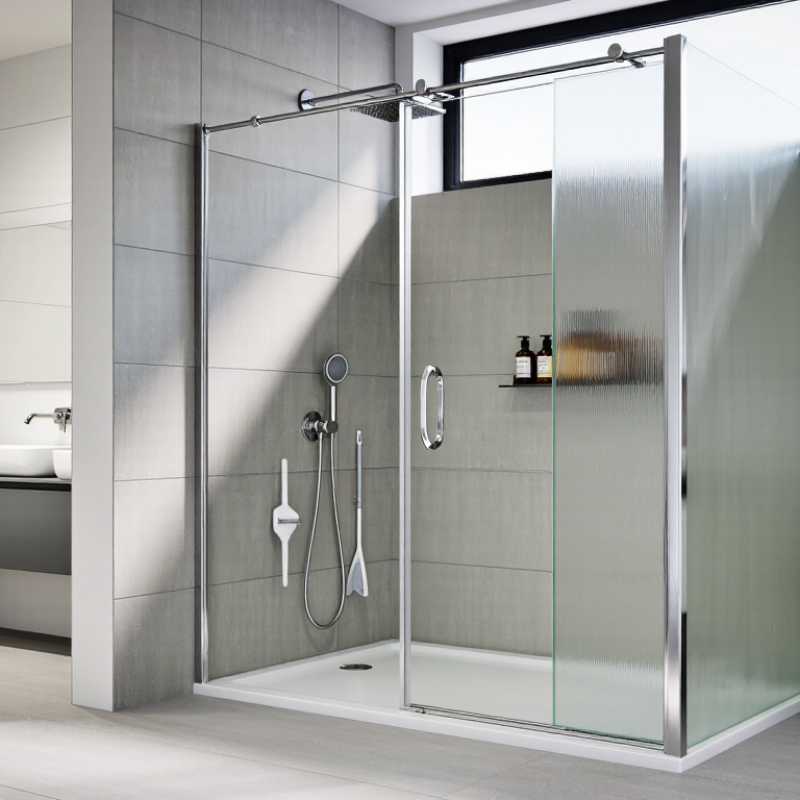
Table of Contents [Hide]
Bathroom Layout and Shower Glass Requirements
In a compact bathroom, start with movement, not the glass sample. Map the shower entry, toilet clearance, vanity drawers, and towel reach on the floor. An inward-swinging door may strike a person or fixture. An outward swing needs safe landing space. Sliding panels save clearance, but their tracks demand regular cleaning. For small rooms, a fixed panel can keep the wet zone open without stealing turning space.
The 2024 U.S. Houzz Bathroom Trends Study reported that 76% of renovating homeowners upgraded their shower area. That demand makes accurate planning more important than visual trends. Measure finished wall dimensions, tile thickness, curb slope, and wall plumbness. Do not measure only the rough opening. Even a few millimeters can create a leaking door gap. A certified installer should verify field measurements before fabrication.
Use tempered safety glass that meets applicable safety standards, such as ANSI Z97.1 or CPSC 16 CFR 1201, where required locally. Common residential options include 6 mm and 10 mm glass, but panel size, hardware, and support determine suitability. Frameless designs need stronger hinges and very stable walls. Wet-room layouts also require correct floor falls, waterproofing, and ventilation. I once prioritized a wide entrance and underestimated splash travel; the layout looked elegant, yet the nearby timber cabinet suffered. That mistake still influences my designs. A clearer panel is not always a safer bathroom. Privacy, glare, cleaning access, and the user’s mobility deserve equal attention.
How to Choose Shower Glass for Your Bathroom in 2026? – Bathroom Layout and Shower Glass Requirements
| Planning Dimension | Bathroom Layout or Glass Requirement | Recommended Data or Specification | Why It Matters | Verification Before Installation |
|---|---|---|---|---|
| Available Shower Width | Measure the finished distance between the walls, curb, or fixed panels. | Record the opening at the top, middle, and bottom; use the smallest measurement for planning. | Walls and floors are rarely perfectly square, and small variations affect panel fit and door operation. | Measure after waterproofing, wall finishes, tile, and the shower base or curb are complete. |
| Shower Door Clearance | Allow the door to open without hitting a toilet, vanity, towel bar, or adjacent wall. | Provide a clear swing path based on the selected door width and hardware configuration. | A visually attractive enclosure may be impractical if the door obstructs bathroom fixtures or a safe exit route. | Draw the door swing to scale on the floor plan before ordering glass. |
| Compact Bathroom Layout | Use a sliding, pivot, or outward-opening door when an inward swing would interfere with the user or fixtures. | Consider a fixed screen or sliding enclosure where circulation space is limited. | These configurations can preserve usable floor area while keeping the wet zone separated. | Confirm that the chosen system still provides comfortable entry and adequate water containment. |
| Walk-In Shower Layout | Use a fixed glass panel with an open entry when the room has sufficient splash-control length. | Position the opening away from the main spray direction whenever possible. | Reducing direct spray toward the opening helps limit water escaping into the bathroom. | Review showerhead direction, panel length, entry location, and floor slope together. |
| Glass Safety Type | Use safety glazing designed for shower enclosures. | Tempered safety glass is commonly used; laminated safety glass may be appropriate for selected designs. | Safety glazing is designed to reduce injury risk compared with ordinary annealed glass when broken. | Check applicable local building codes and require compliance documentation from the fabricator. |
| Glass Thickness | Select thickness according to panel size, support conditions, hardware, and local requirements. | Common residential options include approximately 6 mm, 8 mm, and 10 mm glass. | Thicker glass generally feels more substantial, but structural suitability depends on the complete enclosure design. | Do not choose thickness by appearance alone; obtain a project-specific engineering or fabricator recommendation. |
| Panel Size and Support | Large or unsupported panels require careful placement of hinges, clips, channels, or stabilizing bars. | Use fixed supports where required by the glass size and enclosure configuration. | Proper support helps control movement and protects the glass, hardware, and surrounding tile. | Confirm maximum panel dimensions and hardware capacity with the glass professional before fabrication. |
| Door Orientation | Plan the door to open into a safe, unobstructed area; avoid layouts that trap the user inside the enclosure. | Outward-opening or two-way pivot arrangements may be appropriate, subject to code and hardware design. | The opening direction affects emergency access, circulation, and daily usability. | Check local code requirements, hinge limitations, curb position, and nearby fixtures. |
| Threshold and Floor Slope | Coordinate the glass line with the shower curb, threshold, and sloped shower floor. | The finished floor should direct water toward the drain and away from the bathroom entry. | Incorrect slope or glass placement can cause pooling, leakage, and difficult door operation. | Verify the finished level and slope before final measurements are taken. |
| Water Containment | Place fixed panels and seals according to the spray pattern and enclosure design. | Use compatible seals, sweeps, or gaskets where required by the door and panel system. | Glass alone does not guarantee a watertight enclosure; layout and sealing details are equally important. | Test the shower spray direction and inspect joints, corners, and the bottom door gap. |
| Glass Finish | Choose clear, textured, patterned, or low-visibility glass based on privacy and maintenance needs. | Clear glass maximizes visual openness; textured or patterned glass provides more privacy. | Surface pattern influences light transmission, privacy, cleaning effort, and the appearance of water marks. | Review a physical sample because texture, transparency, and color can vary by glass type. |
| Edge Treatment | All exposed glass edges should be finished appropriately for the enclosure design. | Specify polished or otherwise properly finished exposed edges where required. | Correct edge treatment improves handling safety, appearance, and compatibility with hardware. | Confirm edge finish, corner details, cutouts, and holes before fabrication. |
| Hardware Compatibility | Match hinges, handles, clips, brackets, and channels to the selected glass and panel arrangement. | Confirm hardware load capacity, hole locations, clearances, and corrosion resistance for wet areas. | Incompatible hardware can lead to misalignment, glass stress, premature corrosion, or difficult operation. | Use the hardware manufacturer’s installation requirements without mixing unapproved components. |
| Bathroom Ventilation | Provide effective ventilation for the shower room regardless of the glass style. | Use a properly sized exhaust fan or equivalent ventilation system in accordance with local code. | Ventilation reduces humidity, condensation, mold risk, and long-term damage to finishes and sealants. | Check that the fan exhausts outdoors where required and is not blocked by the enclosure layout. |
| Cleaning and Maintenance | Choose a surface and layout that allow easy access to all glass, corners, seals, and hardware. | Use a squeegee after showering and clean regularly with products suitable for the glass and finish. | Routine care helps reduce mineral deposits, soap residue, staining, and seal deterioration. | Avoid abrasive tools and chemicals that may damage coatings, metal finishes, or silicone joints. |
| Final Measurement | Take final measurements only after all relevant surfaces are finished. | Confirm width, height, diagonals, plumb, level, curb dimensions, and fixture clearances. | Accurate final dimensions reduce fabrication errors and installation delays. | Have measurements verified by the installer or glass fabricator before production. |
| Code and Safety Review | Ensure the enclosure complies with applicable building, glazing, accessibility, and safety requirements. | Check local regulations and recognized safety-glazing requirements, such as applicable ANSI or CPSC provisions. | Requirements can vary by jurisdiction, building type, shower configuration, and glass location. | Obtain approval from the local authority or a qualified professional when code requirements are uncertain. |